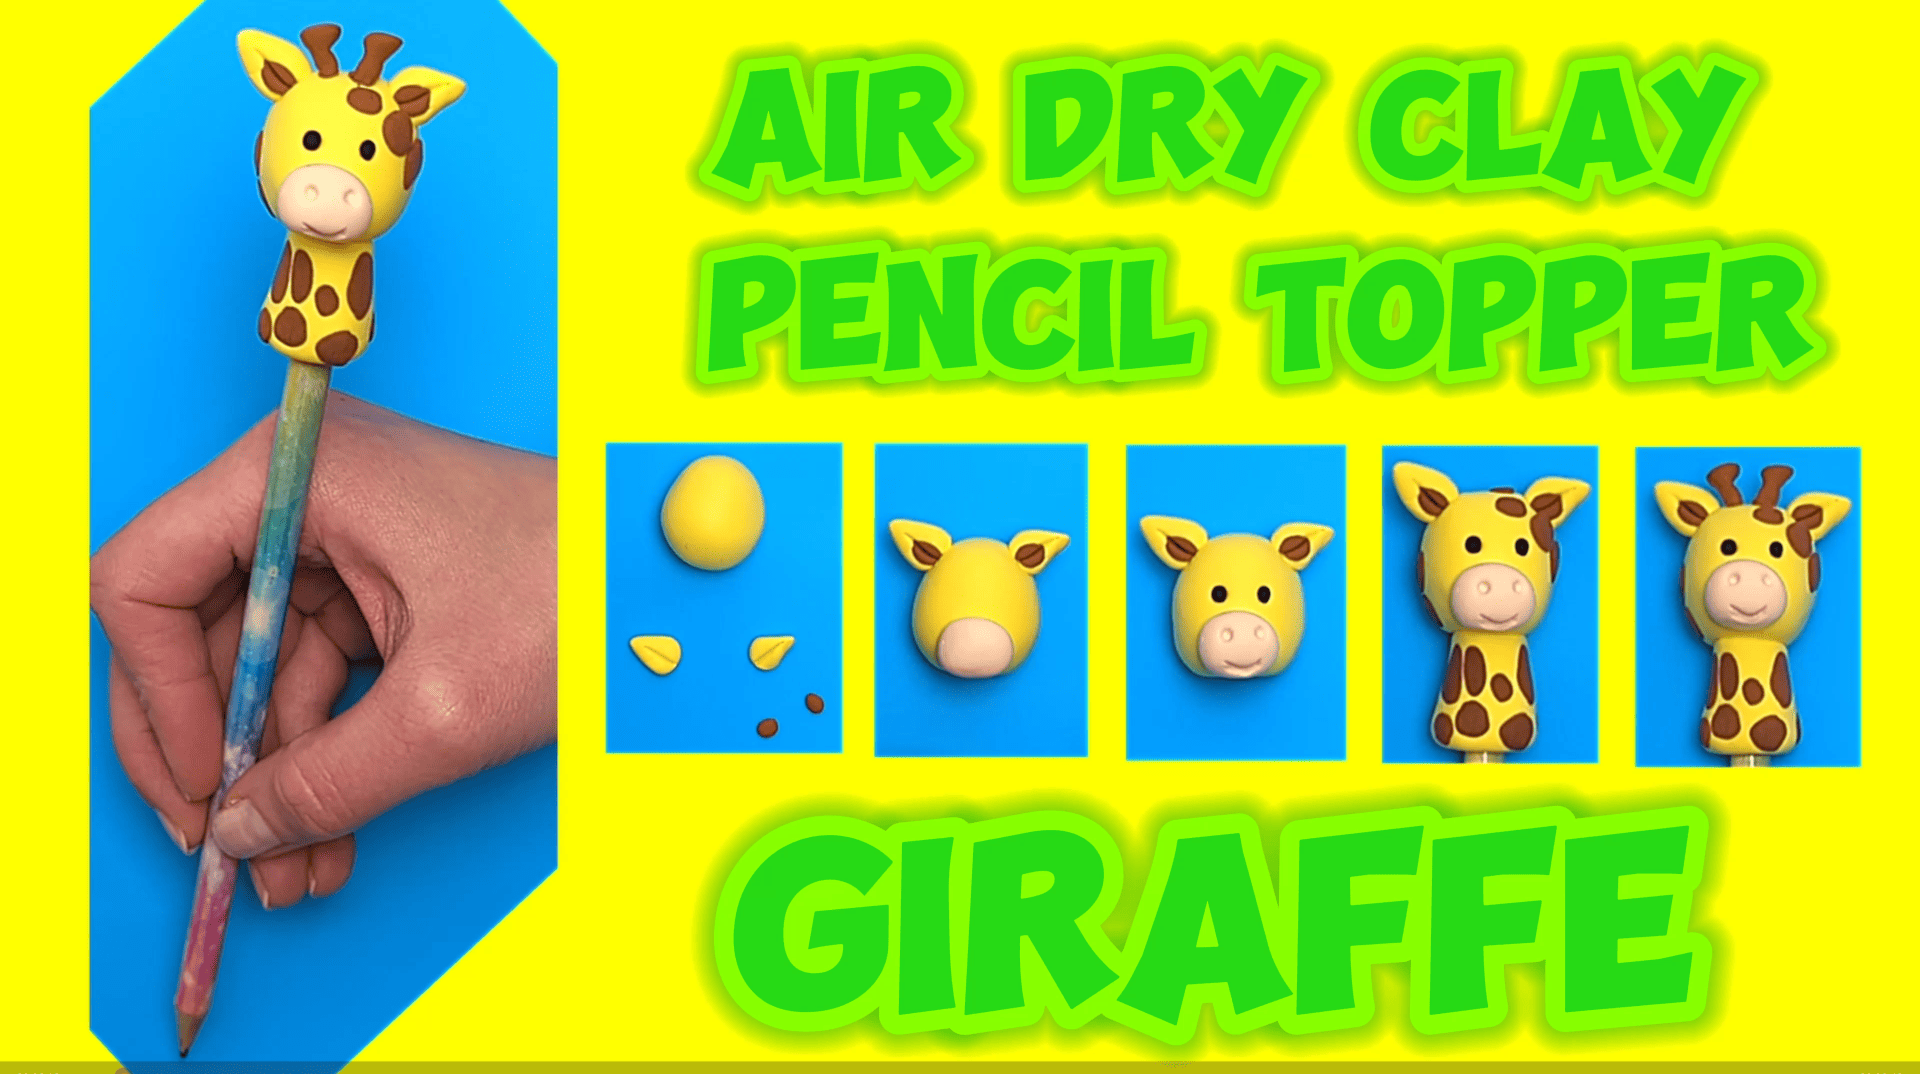
How to Make an Adorable Air Dry Clay Giraffe Pencil Topper for Kids
Welcome to our creative corner, where we’ll show you how to make a charming giraffe pencil topper using air dry clay. This type of clay is a fantastic medium that allows you to mold and shape your imagination without the need for a kiln or oven. This tutorial will guide you through the process step by step, ensuring that you have a roaring good time while crafting your very own giraffe friend. We also attached video that brings the tutorial to life, providing visual guidance and inspiration.
Links included in this articale might be affiliate links. If you purchase a product or service with this link that we provide we may receive a small commission. There is no additional charge to You.
What is Air Dry Clay?
Before we jump into the tutorial, let’s briefly talk about air dry clay. It is a type of modeling clay that, as the name suggests, air dries and hardens over time. It is an excellent option for both children and adults who enjoy sculpting and crafting. Air dry clay is non-toxic, easy to use, and can be painted or decorated once it’s completely dry.
Materials You’ll Need:
Air dry clay (yellow,light pink, brown, and black) and clay tools
Varnish (optional)
Step-by-Step Tutorial:
Step 1: Prepare your work area by covering it with a smooth surface, such as a silicone mat. This will prevent the clay from sticking to your table or countertop.
Step 2: Take a piece of yellow clay and create a small ball. Flatten it and shape it into a slightly elongated oval shape. This will be the giraffe’s head.
Step 3: Use another piece of yellow clay to create two small, pointy ears. You can add some brown clay on the wider part of the ear. Then attach eras to the sides of the head, using gentle pressure.
Step 4: To create snout use light pink clay. Create small oval shape and attached it to lower part of the head.
Step 5: Now, it’s time to give your giraffe some adorable features! Using small pieces of black clay, roll two tiny balls for the eyes. Press them onto the head, slightly flattening them. You can use a tool to create small indents for the nostrils and mouth.
Step 6: To create the giraffe’s long neck, take a piece of yellow clay and gently roll it between your fingers until it forms a smooth cylinder. Attach the head to the body by gently pressing the two pieces together. Smooth out any visible seams using your fingers or a tool.
Step 7: Next, let’s add spots on Giraffe’s head and neck. Use brown clay and shape irregular circles and flat them using tools or fingers.
Step 8: To create two little horns use brown clay. Create cylider shapes and flat upper part using fingers or tools. Then gently attached them on top of giraffe’s head.
Step 9: Finally, carefully insert a pencil into the body of your giraffe, ensuring it fits snugly. Adjust the neck and head if needed.
Optional:
Step 10: If you’d like to add some color, wait for the clay to dry completely before using paints or markers to bring your giraffe to life. Seal your creation with varnish for added durability.
Conclusion:
This adorable companion will surely bring a smile to your face every time you reach for your pencil. Remember, this tutorial is just a starting point—feel free to add your unique touches and embellishments. Let your creativity run wild!